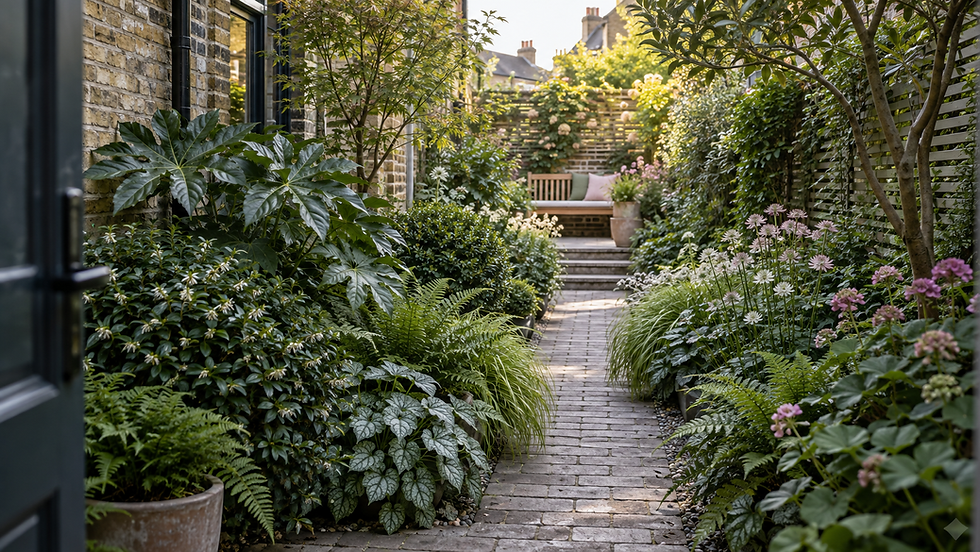
How Wide Should a Garden Border Be? 7 Rules for Better Planting


For most UK gardens, 90–120cm is a useful starting depth for a mixed border. Around 60cm can work for a simpler scheme, while 1.5–2m gives shrubs and perennials enough room to form convincing layers. These are design starting points, not rules: the right width depends on what you want to grow, how you will reach it and how much space the rest of the garden needs.
The mistake is usually not choosing the “wrong” number. It is drawing a thin strip first, then trying to squeeze in plants whose mature spread, structure and maintenance needs demand far more room.
A quick border-width guide
30–45cm: treat this as edging. Use a climber with one repeated low plant, a clipped line or a restrained bulb-and-groundcover combination.
Around 60cm: enough for a compact two-layer scheme if you choose plants with modest mature spreads.
90–120cm: a flexible depth for many domestic gardens, allowing structure, repeated perennials and a lower front edge.
1.5–2m or more: room for shrubs, small multi-stems, grasses and naturalistic planting, provided maintenance access is designed in.
A straight border does not need one depth all the way along. A controlled change in width can create a focal area, make room for a specimen shrub or shift the view away from the boundary.

Seven rules for choosing the right depth
1. Decide what the border needs to do
A border can soften a fence, frame a view, add privacy, guide movement, hold year-round structure or simply bring planting close to a seat. Those jobs require different depths. Screening needs space for woody plants and access; a strip beside a path may only need a calm repeated groundcover.
Write the purpose in one sentence before drawing the edge. If you cannot explain what the border is doing, it is likely to become spare space filled with unrelated plants.
2. Mark it at full size before you dig
Use a hose for curves or string for straight lines, then view the outline from the house, the main seat and the route into the garden. Leave it in place for a day if you can. The shape that looks generous on paper often feels surprisingly ordinary outdoors.
This is also where deeper planting can improve proportion. Award-winning designers Lucy Conochie and Helen Elks-Smith argue that generous planting can visually push a boundary away rather than make a small garden feel cramped; their advice is usefully summarised by Gardens Illustrated. It is professional judgement rather than a universal formula, but it is a valuable counter to the instinct to preserve every centimetre of lawn.
3. Make a narrow border deliberately simple
If 50–60cm is genuinely all you can spare, do not force a three-row mixed border into it. Use the vertical plane: train climbers on wires or trellis, then repeat one or two compact plants below. Repetition makes the limitation look intentional and is easier to maintain than a miniature collection of shrubs and perennials.

4. Let mature plant size set the geometry
Choose the structural plants first and plot their eventual spread, not the size of the pot in the garden centre. The RHS border-planning guide recommends measuring the area and planning to scale; as a broad guide it suggests about five herbaceous perennials, three small shrubs or one large shrub per square metre. Individual plant habits still matter, so use the stated mature spread for the actual spacing.
Young plants can look sparse at correct spacing. Resist filling every gap with another permanent plant. Bulbs, annuals or short-lived fillers can carry the early seasons without creating a congested border later.
5. Build layers, not rigid rows
Published planting theory offers a better model than “tall at the back, short at the front”. In Planting: A New Perspective, Piet Oudolf and Noel Kingsbury explore plant structure, behaviour and combinations. For a domestic border, the useful translation is to give different plants clear jobs and repeat them through the space.
Structure: evergreen or woody forms that hold the design together.
Seasonal interest: perennials, grasses and bulbs that create changing moments.
Ground layer: lower plants that knit the composition together and reduce obvious bare gaps.
Emergents: airy stems that can rise through other layers instead of being confined to the back.
This is why depth helps: it creates overlap and rhythm. It also explains why one tall, transparent plant near the front can feel lively, while a solid shrub in the same position may block everything behind it.

6. Design for the main viewpoint
A border seen mainly from the kitchen needs a readable composition from that direction. An island bed viewed from all sides needs structure nearer the middle. Planting beside a terrace should still look good at close range, where leaf texture, scent and untidy habits are more noticeable.
Aspect and nearby buildings can change the plant palette completely. If the border faces north or sits in building shade, use the same dimensional thinking but choose plants for those conditions; our north-facing garden planting palettes show how structure and repetition can make shade feel designed rather than compromised.
7. Plan access before the plants fill out
For a deep border, add discreet stepping stones, a narrow maintenance route or access from both ends. Keep plants clear of inspection covers and allow room to maintain fences, walls and climbers. The aim is not to create a visible path through every bed; it is to avoid compacting soil and damaging the front layer whenever something at the back needs attention.
Common border-design mistakes
Keeping a thin strip around every boundary. One or two deeper planting areas often create more impact than a continuous narrow ribbon.
Buying plants before measuring. The available area should shape the plant list, not the other way round.
Making every curve equally wavy. Use calm, confident lines; small repeated scallops are difficult to mow and rarely improve the composition.
Ignoring the boundary. A two-metre fence is a strong visual element. Give planting enough mass to soften it rather than leaving the fence dominant.
Forgetting future access. Deep beds are only low-maintenance when you can reach what needs cutting back, tying in or checking.
A practical way to draw the border
Start with a simple plan at 1:50 scale, where 1cm on paper represents 50cm in the garden. Mark doors, paving, drains, trees and anything that must remain accessible. Draw circles for the mature spread of structural plants, then build repeating groups around them. Only after that should you calculate plant quantities.
Outdoors, transfer the line with a hose or spray marker and place empty pots where the biggest plants will sit. Walk the routes again. Check that chairs still pull out, gates open fully and the remaining lawn is a useful shape rather than a leftover.
Before you remove the turf
Measure the available width at several points, not just once.
Check sun and shade through the day and across the seasons.
Identify soil type, drainage problems and compaction.
Confirm the mature spread of the largest plants.
Decide how you will reach the back without treading through the front.
Calculate the area in square metres before ordering plants.
The RHS guide to creating a border notes that ground preparation can be done in winter when soil is neither frozen nor waterlogged, with spring and autumn generally the best planting windows. Local weather and soil conditions should decide the exact timing.
If the border is part of a wider redesign, work out the whole garden before committing to the edge. Our garden design brief questions help clarify views, routes, maintenance and how you actually want to use the space.
When a planting border becomes a design problem
Border depth affects the lawn, paths, terrace, sightlines and planting quantities, so it is often better solved as part of the whole layout. Urban Plot’s human-led garden design service develops the structure, planting and hard-landscape plan together, with measured drawings that make the design easier to price and build.